Showing posts with label Clarity. Show all posts

Friday, 2 July 2021

Bear princess

Hello

I'm sharing another mainly one layer card today. I challenged myself to see if I could do something with the Pink Ink bear hugs stamp that would be a bit more feminine.


I made a mask for the bear and crown by stamping the images on paper and cutting out. I used the inner oval and outside frame of a Clarity oval stencil.

First I positioned the paper bear mask to give me an idea where it was going and stamped the crown. 

Then I masked off the crown, put the frame in place and stamped the bear slightly overlapping the crown, so it wasn't perched on the top of its head.

With outside frame, bear and crown mask in place the script was added using a Giogiocraft stencil.

Keeping the crown mask on and swapping the outside frame for the inner oval, another Giogiocraft stencil was used for the flowers. The arcs were added with a PaperArtsy stamp.

I traced around the edge of the oval with a gel pen and added squiggles. Then two shades of grey Promarker for shadows around the bear and the oval.

Finally the bear was coloured with Inktense pencils and a waterbrush.

The sentiment was stamped, embossed and added separately. The only bit that isn't flat.

I like how she is leaning out of the frame.


A good card for my strong, courageous female friends who fight for what they treasure and believe in. I am blessed to have several of these awesome people in my life.

Thank you for stopping by. Hope you have a lovely day xxx


Friday, 25 June 2021

Flying high

Hello

Today I'm sharing another card using one of my favourite stamps from StempelBar. I love the challenge of making one layer cards which look like they have some depth to them.


The base oval was printed on a gel plate, before stencilling on top with Distress Oxide ink. Careful masking and positioning of the girl and the border strips gives the impression she is just about to drift out of the frame. White gel pen and grey Promarker were added for highlights and shadows.

Sometimes you get an idea that looks complicated but actually is very easy to do. This was quite the opposite! Quite fiddly and lots of detail but doesn't look it. It kept me out of mischief for a while.

Thank you for stopping by. Hope you have an 'uplifting' day xxx


Wednesday, 14 April 2021

Light it up with a lampshade

Hello

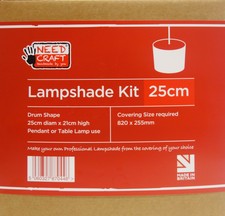
This last week I've been chipping away at a project that I have been forced to take quite slowly. I was given a lampshade kit a while ago and it's taken me some time to decide how to decorate it.

25cm Professional Lampshade Making Kit 5060327870446 by Needcraft for sale  online | eBay

I finally settled on a 'Lavinia' fantasy style scene and chose Inktense pencils as I thought it would look pretty when the light shone through, rather than using opaque paint. I planned it all out first to get the spacing right. You can see what it looked like flat.

Unfortunately the fabric wicked the ink in vertical lines so I had to work slowly in sections and try not to use too much water. 

I used stamps from quite a few different sets including Lavinia, Clarity, Hobby Art and ones from Creative Stamping magazine.


The colours are more muted with the light on but I think it works fairly well.


Of course now I have the old lampshade and I was thinking...what would it look like with a bit of paint on it?!

If you've had a go at decorating lampshades I'd love to hear what you used as I think I could be tempted to have another go.

Thank you for stopping by. Hope you have a lovely week xxx


Wednesday, 21 October 2020

Gel tastic

Hello

After a lovely day messing around in the craft room I have caught up with the inktober monoprinting challenge set by Kim Herringe for those following her course. I've used a mixture of commercial stencils and ones cut myself from paper.

12. Rain

13. Shoes

14. Fish

15. Child

16. Dog

17. Home


18. Letter box


I love the versatility of gel printing. I think the secret is in the paint and the paper. I've invested in more Golden open acrylics, which stay wet long enough to pull a print and a ghost print. I use a 200gsm coated thin card which seems to be flexible enough to pick up a lot of the details but robust enough to not fall apart with multiple paint layers. 

I think the dog going for a walk on the moor is my favourite. Which is yours?

Thank you for stopping by. Have a lovely day xx


Sunday, 14 June 2020

The love of swifts

Hello
Hope you have been enjoying a relaxing weekend. I was up early this morning to catch the best light and finish off a canvas I started a few weeks ago. Most of the canvas was done with stencils and I only used brushes for the swifts.


Of course the more you look the more you want to tinker but I'm blogging so I can say it's done...probably!


I absolutely adore swifts and mark the year by when they arrive and depart. Only six weeks left for me before they start to journey back. Making the most of them.

Hope you have a great week ahead. Thank you for stopping by xxx


Wednesday, 1 April 2020

Colours and Rainbow

Hello
Today is day one of the craft challenge set by Giogiocraft on Instagram #craftingwithgiogio. I have tried to combine the theme of colours and rainbow together with my art journal.

Rainbows are made of small raindrops. 
Happy lives are made from acts of kindness.
Amit Ray


The background is made with Inktense pastels, Distress Oxides through a script stencil and white acrylic paint through a cloud stencil. I then cut a paper skyline to use as a stencil with Distress Ink, and added a little pencil shading.


I then drew around the Giogiocraft balloon die cuts and painted in the backgrounds, before stamping the compass and script. Turn your face to the sun and the shadows will always fall behind you - Walt Whitman.


Finally the die cuts were added and the quotation written around the balloons.


Following a craft challenge is a good way to keep things fresh and try something you wouldn't otherwise do. Next theme is home sweet home...need to get my thinking cap on.

Hope you are all keeping safe and well. Thank you for looking xxx

Saturday, 29 June 2019

Home Sweet Home

Hello
Friends moving house is always a great opportunity for me to use one of my favourite stencils. The background is made using a technique adapted from the 2017 Clarity calendar where good quality watercolour paper is sprinkled with Brusho and made wet. The stencil is placed on top and then more watercolour paper and a few sheets of copy paper placed over it. The sandwich is embossed through a die cutting machine to give a positive and negative image.


I've added additional detail with watercolour pencils to make it a bit more lively.

I hope it will be part of years of happy times in the new home.

Wishing you a lovely day wherever you are xxx

Thursday, 18 April 2019

Hare and the Owl

Hi
A friend and I went to the crafting show at Ally Pally where I succumbed to the lure of the Clarity Three-Way Overlay stamps. Not cheap, but beautifully designed and unrivalled quality....which is my way of explaining how two different sets ended up in my carrier bag!

I started with the hare and the owl as they seem more spring-like. Although I've already made quite a few cards I still have ideas for different combinations of colours. Here are three of my favourites so far...


Hope today is finding you full of the joys of spring. Thank you for taking the time to pop by xxx

Friday, 14 September 2018

Whale of a Time

Hello
A return to a magazine stamp set, this time from Papercraft Essentials. I stamped the image twice and decoupaged the clouds, whale and foreground waves. The background is Distress Ink through a stencil.


Hope you have a whale of a day. Thank you for stopping by xx

Materials used:
Papercraft Essentials issue 160
Clarity stencil: clouds
Distress Ink: weathered wood
Archival Ink: jet black
foam pads
watercolour pencils

Saturday, 12 May 2018

On the Road

Hello
Here's another card using the stamps from Creative Stamping magazine issue 54. The van and signpost are decoupaged but the rest of the background is flat. I masked off the outside and stenciled the chevrons in the circle, then masked off the circle and stamped around the edges. I added shadows with Promarkers to give the illusion of depth.


As I have freinds with camper vans I think this card will come in handy.


A quick one to start the day as I'm off on a London street art walk later. Pictures to follow!

Materials used:
Creative Stamping issue 54
GiogioCraft stencil: directional drops
Clarity stencil: framer shape circle
Distress Oxides
Archival ink
Promarkers

Thursday, 12 April 2018

New Home

Hello there
A super quickie this afternoon as I'm very excited to be packing to go to Ministry of Mixology in Coventry tomorrow for a weekend of messy, mixed media fun. As one of our party has just moved house I thought a card is in order.

I've used another of my Brusho backgrounds using a Clarity stencil and the technique on the 2017 Clarity calendar. The sentiment inside is from Woodware and reads 'wishing you love and laughter.' Sometimes CAS is just what's needed.


Hope you have a great weekend ahead. Thanks for stopping by. xxx

Monday, 1 January 2018

Smile It's 2018!

Hello and a Happy New Year

I hope your 2018 is off to a good start. I was determined to do some crafting today but energy levels are still a bit depleted after a few very hectic weeks. I settled for making a few cards with bits and pieces that I have had lying around for a while, thus tidying up at the same time!

The backgrounds are made using Brusho and stencils through the BigShot. A technique I picked up from last year's Clarity Stamp calendar. (A present from a dear crafty friend...and guess what...I was given one for this year too!)

The layers were made using Tonic dies coloured with Distress Oxides.


The New Year off to a good start by saying hello to 2018 with a smile. I hope that this year brings you and your loved ones happiness and fulfilment. xxx


Monday, 6 March 2017

March brings breezes loud and shrill...

Hi there
It's time for the new verse in The Craft Barn poem challenge:

March brings breezes loud and shrill
Stirs the dancing daffodil.

I couldn't resist popping in some March hares and a few little bird silhouettes. You can hear that the birds sound more lively at the moment, heralding the start of Spring.


I'll be checking in on all of the entries on the blog to see how you get on with the added twist to the challenge!

Sunday, 27 November 2016

I is for Imagination

Hi there
I'm scraping in with my Craft Barn Dictionary challenge project at the last minute. I thought it would be a quick one but it's taken me a bit longer than I expected. I've used paint and masks to create the silhouette and background, then stamped in Memento ink and added a little colour with white paint pen and ProMarkers.


I'm afraid that life seems to have run away with me at the moment so I'm not sure I will be able to get around to commenting on everyone's posts this fortnight but I will do my best to take a look when I can.

Sunday, 9 October 2016

Winter Wreath Scenes

Getting ready for the Chertsey Museum craft and wine evening in November. We'll be making winter scene cards with a mixture of Card-io, Hobby Art and Clarity stamps. If you're in the area it should be a fun night. The museum provides the crisps and you can bring the wine! Follow the link for more details.


Sunday, 24 July 2016

N is for Night

Super quick post for The Craft Barn dictionary challenge. You'd think being on holiday I should have more time, but it doesn't seem to work out that way! I was going to go with numbers for the letter N right up until the point I got the stencils out and saw the Clarity town stencil. That's the joy of crafting you never know where the muse will take you!


Sunday, 10 July 2016

W is for wine

W is for wine...of course! Thought I'd get the gelatos out for a change for The Craft Barn dictionary challenge this fortnight. The background is made with layers of gelatos rubbed through stencils with a baby wipe, then stamping on top with a few highlights. The main image was stamped and watercoloured with the gelatos. A little distress ink was added here and there for shadows with the rings stamped in paint.


Materials used:
Stencils: Stampers anonymous harlequin, Clarity trellis, unknown brick
Creative Expressions stamps: wine label
Faber-Castell Gelatos: buttercream, butterscotch, iced chai, cinnamon, chocolate, red cherry, grape
Archival Ink: jet black, coffee
PaperArtsy Fresco Finish paint: blood orange
Distress Ink: black soot, vintage photo
gel pens, Stabilo All pencil

Sunday, 17 April 2016

D is for Dance

The latest dictionary challenge at The Craft Barn is the letter D with the added twist that there has to be some pink included.  It was easy for me to think of a word as I have a much loved stamp which came immediately to mind.


Scanning is a bit wonky but never mind.  Made this challenge with just a few hours to spare!

Materials used:
Stampendous: tutu toad
Joy Crafts:dance to the music
Fancy Pants: bella brush
Clarity stencil: trellis
script stencil
PaperArtsy Fresco Finish paints
Cosmic Shimmer shimmer paints
Archival Ink: jet black

Saturday, 12 March 2016

R is for Rose

Next letter up in The Craft Barn's dictionary challenge is R.  The background was made by scraping on paint with a card and then stenciling layers over the top. I used crackle paste through a stencil for the rose and painted it when dry.  The colours and the roses remind me of my grandmother and a scarf she had.  xxx


Materials used:
PaperArtsy Fresco Finish paint: snowflake, blue oyster, mermaid, bora bora, 
china, limelight, hyde park, sherbert, orchid, bougainvillea
Tando stencil: leaves
The Crafters Workshop stencil: cherry blossoms
Clarity stencil: double rose, trellis
DecoArt crackle paste